Before a lavender plant goes into the ground, we’ve first got to prepare a bed. And since lavender often thrives for ten years or more, it’s important that we prep the best possible beds for this adored herb to grow in.
You know what they say: Every $5 plant deserves a $10 hole.
Whether you’re growing acres and acres or starting out small, you can follow the same essential guidelines for prepping a bed that lavender will love.
How to prepare a bed for planting lavender
Good drainage is the most vital piece of prepping a bed, but there are a few other features you’ll want to consider as you prep your beds for a spring planting.
Here’s a step-by-step guide to planting lavender.
Design with the end in mind, so that whatever your plans are, you’ll be satisfied with your planting for years to come. Before you even prep your soil, you’ll first want to think about your end goal: Will you be harvesting for any particular purpose? Are you planting purely for aesthetic appeal?
Determining your goals will help you address the four main considerations in lavender planting:
Growing requirements, spacing, weed management and irrigation.
Growing requirements
Know your soil
The first step in understanding the growing requirements for lavender is to know your soil. Get a soil analysis to understand what’s in your soil and what you may need to add. A soil analysis will help you determine soil density and permeability, structure, the amount of organic matter and essential elements like primary macronutrients, secondary macronutrients and micronutrients (nutrients in trace amounts).
Your results will help you decide whether or not you’ll create raised beds, add more nutrients to the soil, till or apply lime.
Understanding lavender’s needs
Once established, lavender’s a relatively hardy plant that doesn’t require much. The key to growing lavender that thrives is to help it establish a healthy foundation, which means understanding its essential needs.
Lavender requires:
- Full sun – a minimum of 6 hours
- Well drained soil
- Weakly acidic (lower pH) to weakly alkaline (higher pH) soil
- Minimum pH of 6.5; range: 6-8
When you understand your soil and these basic requirements for lavender, you can make the necessary adjustments to your planting place. For example, apply lime if you want to raise the pH to 6.5. Build soil structure by adding compost and/or wood chips, or creating raised beds.
Lavender does not need much fertilizer; the nutrient regime is different for new plants vs. established plants, so do a soil analysis periodically for basic maintenance of nutrient levels.
There’s some indication that high nitrogen may decrease the quality of essential oils by increasing the sharp aromatic notes. Applications of excessive amounts can be counterproductive.
Spacing lavender plants
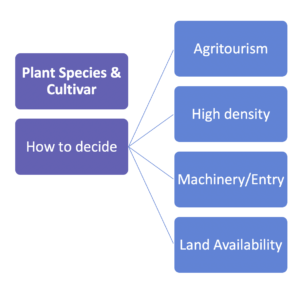 Determining proper spacing depends on the cultivar of lavender you’re planting. As you decide how far apart to plant your lavender plants, consider these factors: agritourism, high-density farming (efficiency and yield), machinery access (harvest method) and land availability.
Lavender plant spacing is species- and cultivar-dependent.
Different types of lavender require various amounts of room to grow. True lavenders are generally more compact, whereas Lavandins generally have longer stems and therefor take up more room.
In general, Lav. angustifolia (True Lavender) plants need a minimum of 2-3 feet between plants. Lav. X. intermedia (Lavandin) plants need a minimum of 3-4 feet between plants.
Why you want to get it right
Improper spacing will affect your harvest and your yields. Plants too close together are difficult to harvest, as stems get entangled. They also block sun from one another, which decreases yield. Planting too far apart is a waste of space and resources: more drip line, more weed fabric, more time walking from plant to plant, etc.
Planting measurements: Key terms
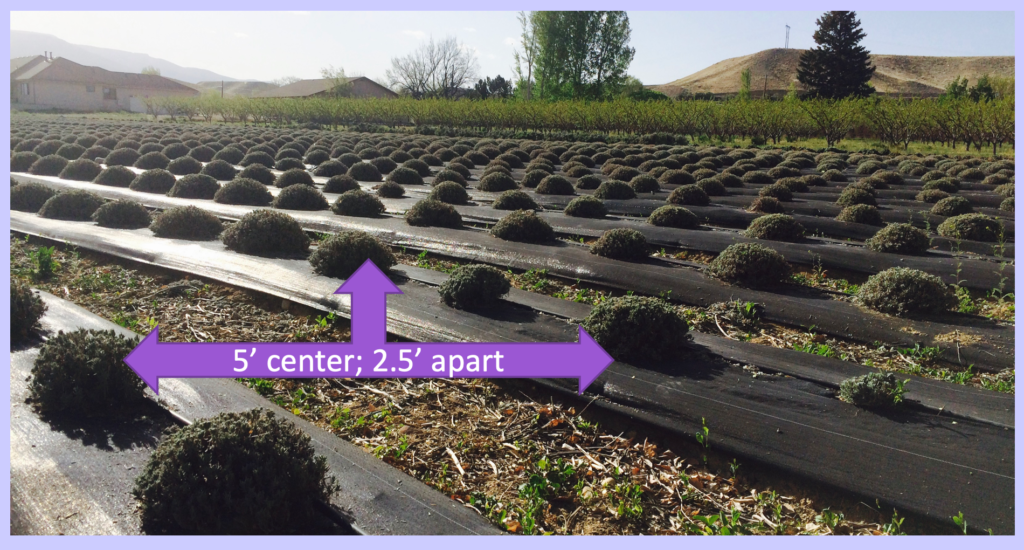
When we talk about plant spacing, we’re talking about both the distance between plants and the distance between rows.
Row spacing depends primarily on equipment, mechanical vs. hand harvest, furrow management, field access and design. In the image above, each row of lavender is 5 feet apart; in this case, we measure from one plant center to the neighboring row’s plant center.
Measuring between plants accounts for the distance between each plant on the same row, from plant center to plant center.
Agritourism
If you plan to use your lavender fields for agritourism, you may want wider rows. On our farm, we have a field designated to U-Pick lavender; in this field, rows are 7 feet apart to allow visitors more room to walk and pick lavender.
Weed control in a lavender field
Cultivating lavender means controlling weeds both in the beds of lavender and in the furrows between rows.
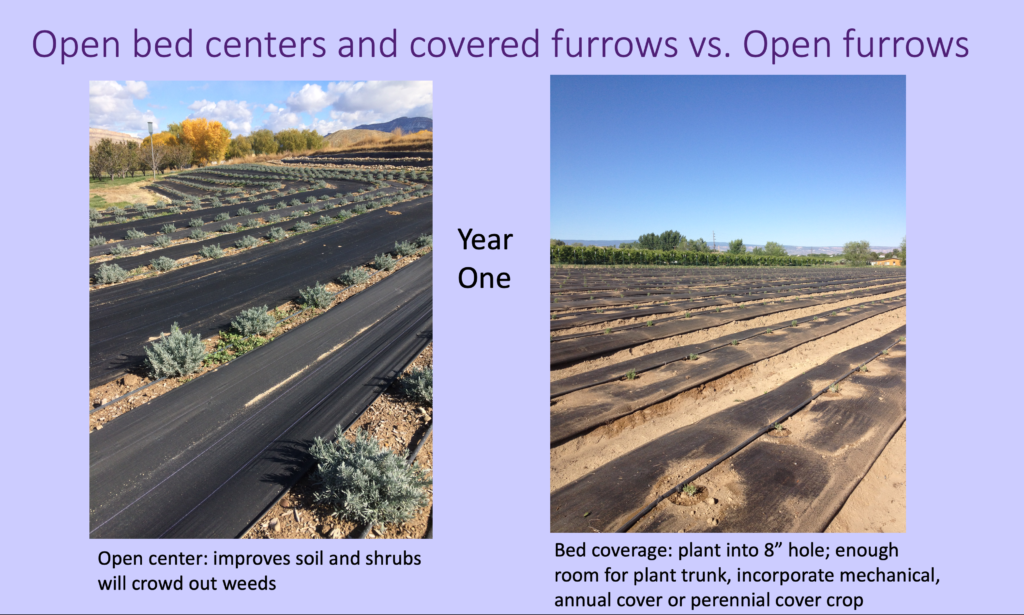
Options for weed control on beds
Open beds are not covered with any kind of fabric; these are, of course, more susceptible to weeds. Whenever possible, use a woven fabric on your beds to control weeds.
Apply pre-emergent application of (organic) weed suppresser. Use cover crop as weed management over the course of a few years.
Options for weed control in furrows
You can also use fabric between rows, though this is a more costly option for larger operations. Cover cropping in furrows is a great option, as you can mow between rows; annual cover crops work well in dry climates, and grass works great in wetter climates.
Mow or till weeds, pull weeds by hand or apply an (organic) herbicide.
Irrigating lavender
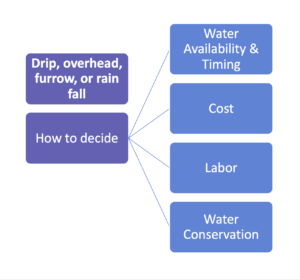 Choosing what kind of irrigation you’ll put in place has much to do with your resources, such as water availability and timing, cost and labor, as well as your priorities, such as water conservation.

Courtesy of Bob Korver
Irrigation options include: furrow irrigation, drip irrigation, overhead watering or rain fall.
Furrow irrigation uses gravity to carry water near the roots that do most of the water uptake, keeping the core of the plant dry. Furrow irrigation is cost-effective, makes deep-soak watering easy, uses less water with established plants and allows for effective intercropping. However, with furrow irrigation, there’s less control to where water lands, which means more weeds; you can plant fewer plants per acre, water conservation is poor and watering time is longer than drip.
Drip irrigation, on the other hand, carries water to plants slowly, in small amounts. With drip irrigation, watering is directed and more precise, there are fewer weeds and good water conservation with the considerably less evaporation. You can plant more plants per acre, and drip can operate with low water pressure. Downsides include a higher set-up cost, the potential need for a pump and electricity, and having to deal with occasional to frequent equipment malfunction and a slow diagnostic time.
Planting is the easy part
Once you’ve done all the work of deciding how to prepare your lavender beds for planting, it’s clear that the actual planting process is the easy part!
Here’s how to plant lavender:
- Prepare soil
- Pre-irrigate (optional) for weed control
- Lay fabric & burn holes (8 inches) where lavender plants will go
- Lay irrigation
- Pre-irrigate
- Plant: 1” plug, 2.5”pot or 4” pot
- Irrigate: watering frequency depends on soil type, outside temperature, and root size
When you invest time in designing your field and preparing your beds for lavender, you’ll thank yourself a thousand times over.
Colleen
Thanks for the information! This helps me in my venture to grow lavender. I’m will start small but hope to grow in a larger scale.
Eva Prikler
How do you treat the area between rows if you cover rows with fabric due to weed control? Don’t Grass cutting/ soil milling machines used in between rows erode the fabric?
Thanks,Eva
Georgia Webb
What weed fabrics do you recommend? Can you send a link?